Welcome to the beautiful land of the Upper Peninsula of Michigan! It's my favorite place in the whole wide world. Has been ever since I was a youth. Well, I'm finally getting started with this blog to chronicle our (my wife and I) journey into the world of urban farming. We don't live in a metropolitan area, but we're still in the city of Iron River, MI. So, it's still urban. We have less than 1/4 of an acre of land, and last year decided to become more self sufficient.
We purchased our house in 2009 for just over $25,000. It was in live-in condition, but being the restless spirits we are, we decided to do a bunch of remodeling - gutted and remodeled the kitchen, gutted and remodeled both bathrooms, gutted what we use as the master bedroom, new carpeting throughout, several new zo-e-shield windows, added insulation to the attic, rebuilt the chimney, replaced and moved the water heater, installed a wood furnace, and put up additional food and emergency storage.
Then, over the Winter this past year, we decided to delve into raising our own chickens. The decision was to harvest our own organic eggs. We did some research into
Chicken Coops, and found that a
Chicken Tractor was our best bet. After doing more research, we decided the
Eglu Cube by
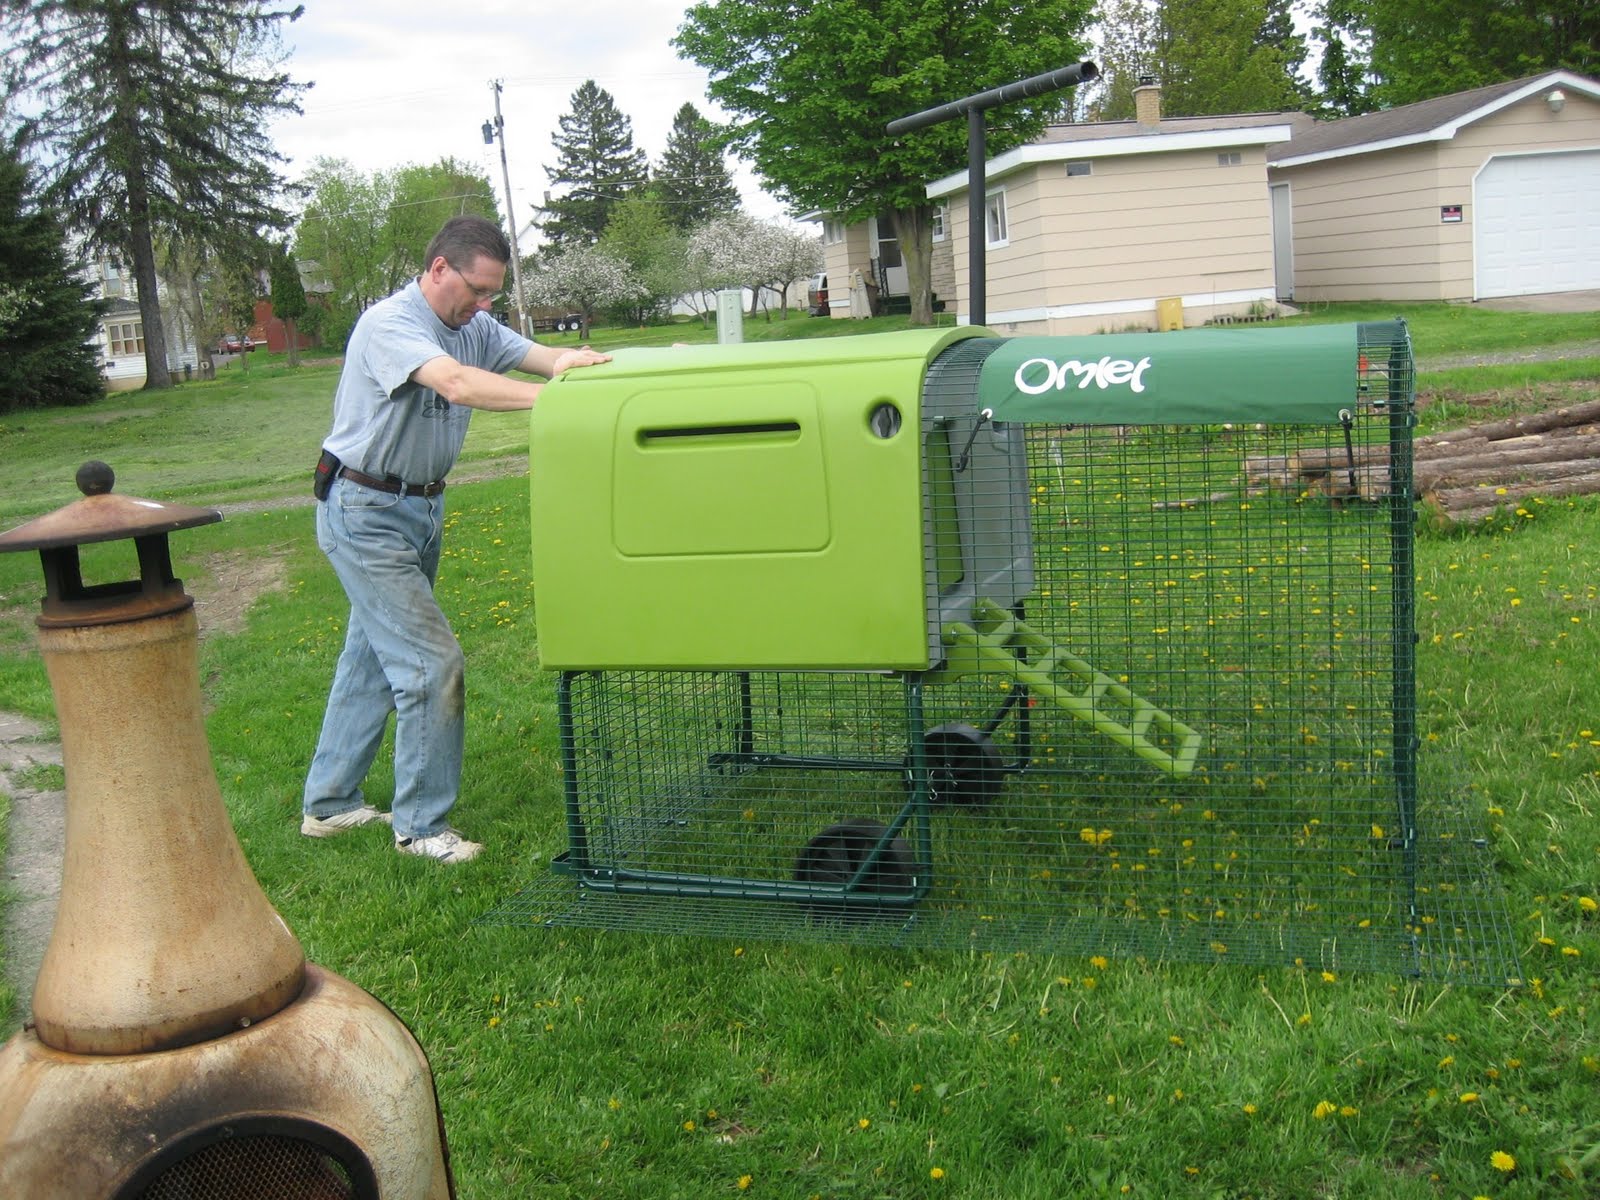
Omlet was the way to go. It is not an inexpensive solution, but being made of a high grade of plastic, and being quite modular in design, it is easy to clean, care for, and keep pesky pests away from our chickens. So, in March or April we actually placed our order for the Cube. It comes from England, and they only ship periodically, so we needed to get into the queue to receive ours. We had a lot of preparation to get ready for the chickens anyway. We needed to fence in the back yard (we had already made the decision to do an organic garden as well), and wanted mostly to keep the deer and other large animals out.
 |
| North fenceline & tilled garden. |
 |
| South and Southwest fenceline |
 |
| South and slightly East |
 |
| East Fenceline |
I heard someone on a local call-in radio program who had a lot of cedar posts that I could purchase for a reasonable price. I went and picked up about 40 of them. In mid-May, I took a week off work, and planned on getting the fence in, the wind generator up, and a whole lot of other tasks. I highly under-estimated my work load. Turns out the ground was still frozen in some spots. As I began digging the holes, I hit something solid. I thought it was just hard, rocky soil (we are in iron country after all). After trying a second hole, and hitting the same thing, I determined it was going to be necessary to use a power auger. So, I went and rented one. After having a hard time drilling the first hole, and inspecting what came out, I realized it actually was frost I was hitting. Fortunately, there were only three holes that were frost ridden - places where the sun did not shine much. The rest was a piece of cake. I'm glad I had the power auger, though. It went much faster.
Well, at the end of that week, I had only gotten 3/4 of the fence posts placed, and no fencing put up. I had to work frantically the next couple of weekends in order to finish up the fence, and build the gates.
 |
| Eglu Cube as shipped. |
 |
| Inspecting each box. |
After some rather disconcerting issues with the shipping company (Greyhound), the
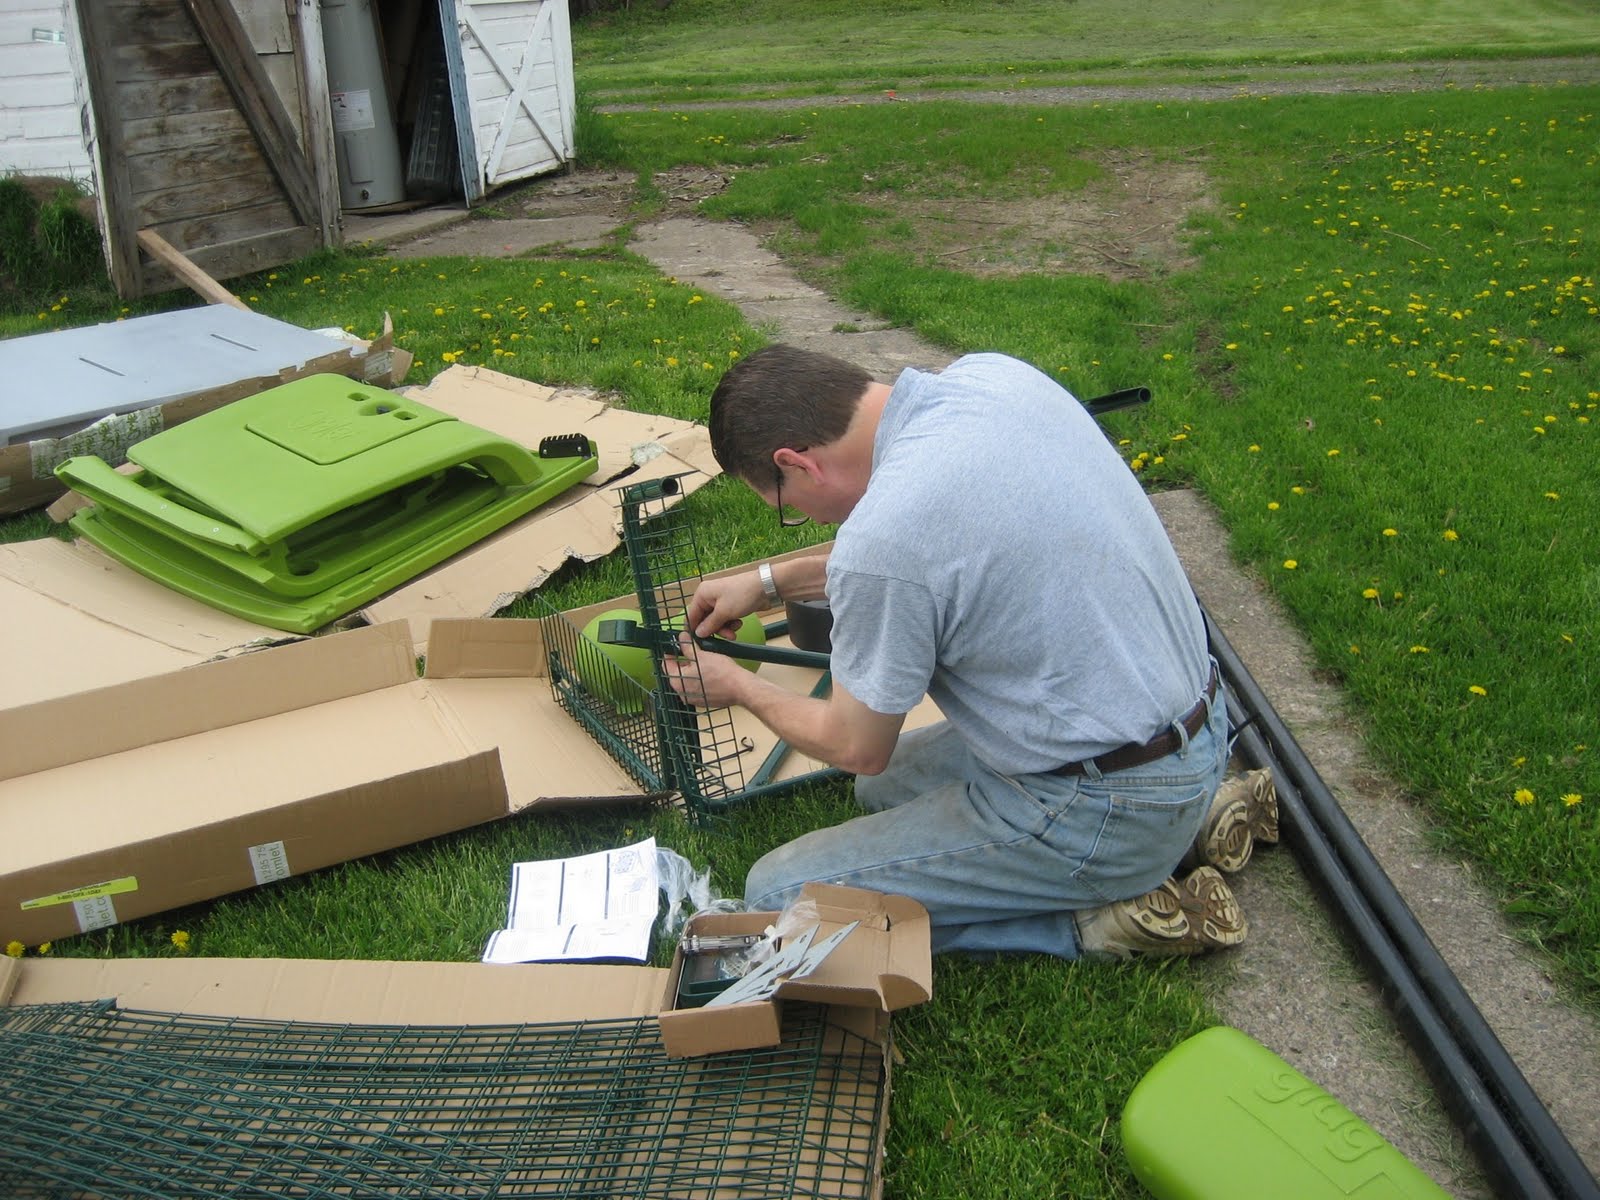
Cube finally showed up. I was home the weekend it was supposed to be in, but only one box came. Sheri had to go get the rest of them when they finally arrived at the Iron Mountain depot. It came in five large boxes. I decided to document step-by-step putting it together, figuring it might be a useful tutorial for
Omlet.
 |
| Everything is there. |
 |
| Retrieving the first pieces to assemble |
After inspecting each box to make sure there was nothing missing (some of the boxes had some good sized holes in them), I looked over the instructions. They said it would take a few hours to assemble. Sheri thought I was nuts to have her take a photo of each step, but I like to be helpful, and if it can help even one person it's worth it. Besides, I had fun doing it.
 |
| Putting together the wheel assembly. |
 |
| Installing the supports to the base. |
Assembly was pretty straight-forward, as long as you closely followed the instructions. There were a couple of times when I had to scratch my head before figuring out which piece was called what. Plus, you had to start assembling it upside down until it was to the point that the supports and wheels were installed. A cordless drill is a godsend in this situation. I've put a lot of use into that drill - remodeling four houses, and countless other work over the last ten years. It speaks well of
Ryobi.
 |
| More assembly of the "tractor". |
 |
| Tractor assembly & back of run. Done! |
I'm glad it was a nice day outside, because it would have been quite cramped to have to assemble the unit in my small garage. It's not a large tractor (only 3' X 4'), but all the pieces are so large that there wouldn't have been a lot of room to keep everything. Besides, it was great being able to get photos with the green grass, and dandelions <GRIN>.
 |
| Front wall, installed. |
 |
| Installing the ladder. |
 |
| Installing the wire mesh run. |
One great feature of the
Cube is that the house and nesting box are actually more like a condo, and the run goes underneath. The chickens have absolutely no trouble getting up to the ladder to go to bed at night. In the morning they usually just flap their wings and "jump" down.
 |
| Installing the skirt. |
We were quite concerned that the chickens might peck at the plastic, and ingest it. They haven't done that at all. Since we're concentrating on everything being organic, we were quite concerned, but it turned out to be a needless worry.
It was quite interesting dealing with someone in England to purchase this product. I dealt with Clare, and no matter how upset we might have become, she always was pleasant and easy to deal with. We didn't really get upset, but did get firm with her a couple of times when the shipment didn't come like it was supposed to. They're also about six or seven hours ahead of us, so that didn't make it easy to always talk to Clare when we needed to.
 |
| Side panels going on. |
 |
| Installing divider for nesting box. |
One of the best features of this tractor is the ten inch skirt around the run. It is literally fox, and other rodent, proof. They cannot dig underneath it to get at the chickens. Another great feature is that there are two drawers that we line with newspaper for the droppings that go under the roosting bars. Makes cleaning a breeze. There's also easy, outside access to the nesting box, and the front door slides open and shut from the outside. The handle for the front door stores away, and animals can't get at it.
 |
| Installing the roof and back access panel. |
 |
| Installing the roosting bars. |
The roof slides forward, and the back panel comes out for easy access to clean. The beauty of the unit being plastic is that it can simply be washed and scrubbed down in every nook and cranny. It's also properly vented so the air does not become stagnant. Chickens like to take dust baths, and that adds to the pollution inside a coop if it is not properly vented. Also, chickens are prone to some sort of red mites that can make them quite sick. Those mites can't live in this coop - especially after cleaning.
 |
| Moving the tractor. |
 |
| Installing small fence. |
Omlet says that this tractor can house up to ten chickens. Maybe in theory, but I don't know if I would want to put more than six in it. If they were never let out of the run, I wouldn't put more than the three we have in it. So, we may add another three chickens eventually.
Moving the
Cube is not as easy as
Omlet makes it out to be. Yes, the wheels are large, but there's nowhere to grab onto for control. If the yard was perfectly smooth, then it would be much easier, but our yard has small divots all over it. The chickens dig additional holes as well. I decided to add a couple of handles to the back panel to make it easier to balance on the two wheels, and to pull it if necessary. Makes moving a bit easier.
 |
| Completed Cube with feeder & waterer |
One thing we read about was that since the spacing on the fence that comes with the
Cube is 2" X 4", raccoons and other such animals can reach in, grab a chicken, and tear it to pieces. We didn't want that to happen, so we went to the big box store and picked up some light fencing that is just 1/2" square and two feet tall. We installed that all the way around the base of the run, and have not had an issue whatsoever. Although, I must say that since I installed the six foot fence around the yard, we haven't even seen rabbits back there. So, I guess that's a double deterrent.
All in all we're quite happy with the
Cube. Even though it's supposed to be insulated against the cold, we've decided we're going to keep the chickens in our wood room in the house for the winter. It gets very cold up
here, and we don't want any chickens freezing their toes or combs off.
 |
| The chickens arrived healthy & sound |
 |
| Wondering what's up. |
Well, around June 22, early in the morning, I got a call from the local Post Office telling me that the chickens had arrived. We opted to purchase them through
Omlet. They were guaranteed to have been raised organically, and were within four to six weeks of laying. I believe they came from a grower in Ohio. I was out of town, so Sheri had to go get them. It wasn't a large box, so was rather easy for her to handle. I reminded her to document it in pictures.
 |
| Checking out their new home. |
 |
| Beulah, Henrietta, & Nellie. |
 |
| First eggs. Rather small. |
 |
| Granddaughter helping collect |
She introduced them to their new home, and they took right to the food and water. The first bag of feed came from
Omlet, but it wasn't soy free. So, I ordered some soy-free layer mix from
Super Soy, a subsidiary of
CFS. (Funny how I would get a soy-free product from a soy processing plant.) It runs only $16/bag, but I have to pick it up in
Brodhead, WI. As I was only about 20 minutes from there all Summer, that wasn't a problem, but now I think I'm going to have to find a different supplier, or get in with a group of people and order a pallet at a time so it's not so expensive to ship. Three chickens don't go through a lot of feed - especially since we feed them tomatoes, watermelon, table scraps, and they're able to free range.
 |
| Searching for treats (bugs, worms, etc.) |
 |
| Watching the chickens. |
We affectionately named the chickens Henrietta, Beulah, and Nellie (for nervous Nellie - she squawks the most when picked up). Within two weeks, Sheri found two eggs in the nesting box. But it was at least another four or five weeks before there were more. I guess one of them was farther along than the others. They're now laying regularly one egg each per day. Our oldest son and his
family were here for two weeks in August, and our granddaughter, Sadie, loved to go check for eggs. She was nervous around the chickens at first, but then warmed up to them. They're very friendly birds, and love to follow us around the garden. If we're picking tomatoes, and not watching out, Henrietta will come and take them right out of the bucket. They LOVE tomatoes!
Many more adventures to come.
Update:
If you are not in a position to purchase one of these Eglu Cube tractors, you can build your own coop. There are lots of resources for plans online. Here are a few:
1.
Building a Chicken Coop
2.
How to Build a Chicken Coop with Easy Step-by-Step Instructions
3.
Easy D.I.Y. Chicken Coop Plans